Thursday, July 25, 2013

Download and install Stock ROM for galaxy y S5360 (s5360ddla1) Indian official version With odin.

The stock ROM for galaxy y s5360 is really hard to find on the internet With all the files needed . If there's PDA there's no CSC if there's all the files present there is no Pit file present or if all the files are present there is no odin . So here are all the links and the procedure to install it too . All you u need to do is download these files and install odin and point them correctly using odin to flash it . well lets get started :) The picture explains it all for the flashing . The build versions and the links are given below .

1. Take your Phone put it into Odin mode i.e download mode (Home+lock key+volume down) For 3 seconds. 

2.press voulme up to contine.

3.Install kies and restart your PC. 

4.After booting your phone into download mode then connect the USB cabel and start ODIN and load the appropriate files as shown below in the image . 

5.Remember to UNCHECK the re-partion check box. After loading all the files.

6.Press start and you are Done .

7.The green light suggests that you have flashed or installed stock ROM SUCCESSFULLY . 

Selecting the files:


Bootloader: BOOT_S5360DDLA1_REV05.tar.md5
DefaultCalDataWithBoot_S5360DDLA1_REV05.tar.md5 (Use this one)
PDA: PDA_S5360DDLA1_REV05.tar.md5 
Phone: MODEM_S5360DDLA1_REV05.tar.md5 
CSC: GT-S5360-MULTI-CSC-ODDLA1.tar.md5 


BUILD INFORMATION: S5360DDLA1

        PDA:S5360DDLA1
       PHONE:S5360DDLA1
       CSC:S5360DDLA1
       Kernel:2.6.35.7 dpi@DELL170#1
       ANDROID VERSION:2.3.6


Stock ROM for Galaxy Y (s5360ddla1) 

Totoro.pit Files 

Download Odin 

Samsung Kies 

Friday, July 12, 2013

Malware PRIYANKA & How To Remove The Malware .

Malware priyanka is a malware which is spreading rapidly through watsapp . Priyanka is said to be a ex of the creator of the malware . Although it is really not clear who created the malware .

The malware potentionally doesn't damamge anything other than replacing all you contacts and group names to priyanka . Well if you have a friend named priyanka you might be trouble , cos to remove the malware you got to delete the contact of the malware priyanka .

After you delete the contact you might have to uninstall wats app and reinstall it back to get your chat history back through the back up which wats app usually does for every hour .I suggest after reinstalling wats app do install a anti virus and scan your phone completely .


I'll tell you my personal experience , where my friend asked me to save this contact and see a magic happening . She sent the contact details and asked me to save the file . This is social engineering which she did to get the contact stored on my phone . After saving i noticed all the group chats were all renamed to priyanka . Gosh was soo pissed at her .

Later followed the following steps above and removed malware priyanka from my phone .

Monday, July 1, 2013

How to shorten your phishing page to make it undetectable!!

This is a very short article i am writing because there are some chances that some idiot person will report your phishing page abuse . so what can you do at that time ?? Well there is a solution that . You can use url shortening websites which are available . one of them which i specifically use is http://www.bit.ly Altough there are many more websites available in the web , you can google it out .

You can also use DNS forwarding also , what this basically does is that you create another link from a DNS forwarding wesite . This link will forward it to your phishing page. There are a lot of DNS forwarding websites available in the web Google it.


How to Change logon screen in windows 7

Today i will show you how to change your log on screen in windows 7 . This is possible and a good trick to show off . Just follow the steps.

1. The image you need to set as the background should be a .jpg file and it’s size should not exceed 245KB.

2. The image resolution can be anything of your choice. However I prefer 1440 x 900 or 1024 x 768. You can use any of the photo editing software such as Photoshop to compress and set the resolution for your image. Once you’re done, save this image as backgroundDefault.jpg.

3. You will need to copy this image to C:\Windows\system32\oobe\info\backgrounds You will need to create that path if it does not already exist on your computer.

4. Now open the Registry Editor (Start -> Run -> Type regedit) and navigate to the following key HKLM\Software\Microsoft\Windows\CurrentVersion\Authentication\LogonUI\Background

If Background does not exist rightclick LogonUI, select New and then Key, and then name it Background. Now locate OEMBackground (listed on the right side). If it does not exist, right-click Background and select New and then DWORD and name it OEMBackground.

5. Double-click on OEMBackground and set the Value Data to 1.

6. Now log-off to see the new logon screen background. If you would like to revert back to the default background, just set the Value Data back to 0.

NET TOOLS:: the best hacking tools in one package.


Hi , Today i am gonna show a tool called net tools.There are different types of stuff that you can do using this tool. This tool is used by network admins to secure their network.We can use this tool to do many stuff like pinging to know the ip. email bombing,email spoofing etc.There are more than a thousand sub tools available in this tool wch are easy to access. you can download this tool from here . I currently have 3.1v there might be even a latest version.You can download the v3.1 from here net tools

How to use gmail as your addidional storage space in your PC.

Today i am going to show you how to make your gmail as your hard disk . Wondering !! Is it possible ?? , answer is Yes . it is possible . Gmail uses 7mb of memory to e-mails which we receve , But in reality all the 7mb does not gets used up and a lot of space gets wasted . we use this space our data .


Steps to follow !!

1. You will need a gmail drive you can download it from here Download gmail drive
2. Extract the contents to a folder and install it .
3. After installing you will find a new drive in my computer . right click it and select login .
4. After login you can use the drive .
5. If the drive the is full you can log out by right clicking and select log out , and login again by a new gmail id .
6. have fun storing your data in a secure locker which only you can access .

Getting older programs to run on windows xp.

Most programs run properly on Windows XP. The exceptions are some older games and other programs that were written specifically for an earlier version of Windows. To run your program on Windows XP, you can try the following, Run the Program Compatibility Wizard. As an alternative, you can set the compatibility properties manually. Update your program, drivers, or hardware. These options are covered in detail below.

The Program Compatibility Wizard

This wizard prompts you to test your program in different modes (environments) and with various settings. For example, if the program was originally designed to run on Windows 95, set the compatibility mode to Windows 95 and try running your program again. If successful, the program will start in that mode each time. The wizard also allows you to try different settings, such as switching the display to 256 colors and the screen resolution to 640 x 480 pixels. If compatibility problems prevent you from installing a program on Windows XP, run the Program Compatibility Wizard on the setup file for the program. The file may be called Setup.exe or something similar, and is probably located on the Installation disc for the program. To run the Program Compatibility Wizard click Start, click Help and Support, click Find compatible hardware and software for Windows XP, and then, under See Also in the navigation pane, click "Program Compatibility Wizard."

Set the compatibility properties manually

As an alternative to running the Program Compatibility Wizard, you can set the compatibility properties for a program manually. The settings are the same as the options in the Program Compatibility Wizard. To set the compatibility properties for a program manually Right-click the program icon on your desktop or the shortcut on the Start menu for the program you want to run, and then click Properties. Click the Compatibility tab, and change the compatibility settings for your program. The Compatibility tab is only available for programs installed on your hard drive. Although you can run the Program Compatibility Wizard on programs or setup files on a CD-ROM or floppy disk, your changes will not remain in effect after you close the program. For more information about an option on the Compatibility tab, right-click the option and then click "What's This." Update your program or drivers

If your program does not run correctly after testing it with the Program Compatibility Wizard, check the Web for updates or other fixes, as follows:
Check the Web site of the program's manufacturer to see if an update or patch is available. Check Windows Update to see if a fix is available for the program. Click Home on the menu bar of Help and Support Center, then click Windows Update in the right pane.
If the program is a game that uses DirectX, ensure that you are using the latest version of DirectX. In addition, check the Web site of the manufacturer of your video card or sound card to see if newer drivers are available for either of them.

How to resume your PC when it is not responding

Has it ever happened to you !! when your system suddenly stops responding in ways like it if you try to open something it just hangs? One time I tried deleting a folder and it said it was in use, but it really wasn't. If this ever happens to you, you can follow these simple steps to 'reboot' your computer without 'rebooting' it.

Press CRTL + ALT + DEL


Go to the 'processes' tab and click explorer.exe once and then click 'end process'.
Now, click File > New Task and type explorer.exe
Everything should be fine now! If the problem is major, I would recommend actually shutting down then starting up again.
Has it ever happened to you !! when your system sudddenly stops responding in ways like it if you try to open something it just hangs? One time I tried deleting a folder and it said it was in use, but it really wasn't. If this ever happens to you, you can follow these simple steps to 'reboot' your computer without 'rebooting' it.

Press CRTL + ALT + DEL

Goto the 'processes' tab and click explorer.exe once and then click 'end process'.
Now, click File > New Task and type explorer.exe
Everything should be fine now! If the problem is major, I would recommend actually shutting down then starting up again. - See more at: http://www.hackerspoint.bugs3.com/responst.html#sthash.1VPfORCu.dpuf

HOW TO CAPTURE STREAMING MEDIA

There are many websites (http://ww.smashits.com) stream songs and videos people believe they cannot be downloaded, quite why i dont know. They kinda think there is no file present to download

once the file is located it can then be retrieved by nettransport nettransport is able to download any file whether ftp.
steps to follow during download :

1. Download Project URL Snooper 1.02.01 from http://rain66.at.infoseek.co.jp/

2. Install URL Snooper (and WinPcap together)

3. Don't run URL Snooper when it is done installing

4. Restart computer

5. Open Project URL Snooper

6. Click on the General Options Tab

7. user posted image

8. Chose a network adapter

9. Now click on the search tab

10. Click Sniff Network

11. Go to a webpage and you should see some results in the results list

12. If nothing is appearing then chose another network adapter, until one works

13. Now you are ready to begin searching

14. Click the "Hide Non-Streaming URLs" option to hide all http:// references and only show URLs corresponding to streaming audio/video (rtsp, pnm, wma, etc.)

15. Then click Sniff Network

16. Your links should appear as you begin streaming your file

17. Select your desired stream user posted image

18. usually rm file user posted image

19. On the bottom there should be the link which you simply copy user posted image

20. Download nettransport from here ftp://down_transport:123@s1.5fox.com/NT2Setup_multi.EXE or ftp://nettransport:nettransport@61.153.24...Setup_multi.EXE http://lycos26486.l97.lycos.com.cn/download.htm 21. Install it

22. Click on new

23. Paste link
There are many websites (http://ww.smashits.com) stream songs and videos people believe they cannot be downloaded, quite why i dont know. They kinda think there is no file present to download

once the file is located it can then be retrieved by nettransport nettransport is able to download any file whether ftp.
steps to follow during download :

1. Download Project URL Snooper 1.02.01 from http://rain66.at.infoseek.co.jp/

2. Install URL Snooper (and WinPcap together)

3. Don't run URL Snooper when it is done installing

4. Restart computer

5. Open Project URL Snooper

6. Click on the General Options Tab

7. user posted image

8. Chose a network adapter

9. Now click on the search tab

10. Click Sniff Network

11. Go to a webpage and you should see some results in the results list

12. If nothing is appearing then chose another network adapter, until one works

13. Now you are ready to begin searching

14. Click the "Hide Non-Streaming URLs" option to hide all http:// references and only show URLs corresponding to streaming audio/video (rtsp, pnm, wma, etc.)

15. Then click Sniff Network

16. Your links should appear as you begin streaming your file

17. Select your desired stream user posted image

18. usually rm file user posted image

19. On the bottom there should be the link which you simply copy user posted image

20. Download nettransport from here ftp://down_transport:123@s1.5fox.com/NT2Setup_multi.EXE or ftp://nettransport:nettransport@61.153.24...Setup_multi.EXE http://lycos26486.l97.lycos.com.cn/download.htm 21. Install it

22. Click on new

23. Paste link - See more at: http://www.hackerspoint.bugs3.com/stream.html#sthash.0kbJGKYf.dpuf

HOW TO CHANGE THE DEFAULT LOCATION FOR INSTALLING APPLICATION ON YOUR WINDOWS


As the size of hard drives increase, more people are using partitions to seperate and store groups of files.
XP uses the C:\Program Files directory as the default base directory into which new programs are installed. However, you can change the default installation drive and/ or directory by using a Registry hack.
Run the Registry Editor (regedit)and go to
HKEY_LOCAL_MACHINE\SOFTWARE\Microsoft\Windows\CurrentVersion
Look for the value named ProgramFilesDir. by default,this value will be
C:\Program Files.
Edit the value to any valid drive or folder and XP will use that new location as the default installation directory for new programs.

HOW TO HIDE FILES INSIDE A IMAGE FILE USING COMMAND PROMPT

today I'm gonna show you how to combine two files .


step1: collect all the data that you want to hide and zip it using winrar or winzip or some zip software . you can do this by right clicking anywhere on the desktop->new->winrar archieve and just drag and drop the files to hide inside the archive .

step2: now select a picture you want to hide or to make it front end and save it in the same location as that of the archive .

step3: open run->type cmd , go to the location you want to by using cd command .

step4: now using copy command v r going to hide the rar file inside jpg file . copy /B front end file.jpg+hidden.rar secret.jpg


step5: now when you open 1234.jpg the front end pic will open up , but when you right click on that same pic and open it with winrar then you will see all your hidden files in one archive .Notice the file names are same , even the rar file has jpg format .


Guide to cracking bios passwords

Ever wonder how to crack bios passwords ??? well here goes a full guide on cracking bios passwords !!!
BIOS passwords can add an extra layer of security for desktop and laptop computers. They are used to either prevent a user from changing the BIOS settings or to prevent the PC from booting without a password. Unfortunately, BIOS passwords can also be a liability if a user forgets their password, or changes the password to intentionally lock out the corporate IT department. Sending the unit back to the manufacturer to have the BIOS reset can be expensive and is usually not covered in the warranty. Never fear, all is not l ost. There are a few known backdoors and other tricks of the trade that can be used to bypass or reset the BIOS


Before attempting to bypass the BIOS password on a computer, please take a minute to contact the hardware manufacturer support staff directly and ask for their recommended methods of bypassing the BIOS security. In the event the manufacturer cannot (or will not) help you, there are a number of methods that can be used to bypass or reset the BIOS password yourself. They include:
Using a manufacturers backdoor password to access the BIOS
Use password cracking software
Reset the CMOS using the jumpers or solder beads.
Removing the CMOS battery for at least 10 minutes
Overloading the keyboard buffer
Using a professional service
Please remember that most BIOS passwords do not protect the hard drive, so if you need to recover the data, simply remove the hard drive and install it in an identical system, or configure it as a slave drive in an existing system. The exception to this are laptops, especially IBM Thinkpads, which silently lock the hard drive if the supervisor password is enabled. If the supervisor password is reset without resetting the and hard drive as well, you will be unable to access the data on the drive.
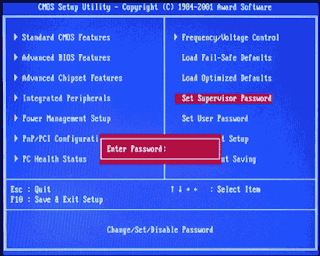
--------------------------------------------------------------------------------
Backdoor passwords
Many BIOS manufacturers have provided backdoor passwords that can be used to access the BIOS setup in the event you have lost your password. These passwords are case sensitive, so you may wish to try a variety of combinations. Keep in mind that the key associated to "_" in the US keyboard corresponds to "?" in some European keyboards. Laptops typically have better BIOS security than desktop systems, and we are not aware of any backdoor passwords that will work with name brand laptops.
WARNING: Some BIOS configurations will lock you out of the system completely if you type in an incorrect password more than 3 times. Read your manufacturers documentation for the BIOS setting before you begin typing in passwords
Award BIOS backdoor passwords:
ALFAROME ALLy aLLy aLLY ALLY aPAf _award AWARD_SW AWARD?SW AWARD SW AWARD PW AWKWARD awkward BIOSTAR CONCAT CONDO Condo d8on djonet HLT J64 J256 J262 j332 j322 KDD Lkwpeter LKWPETER PINT pint SER SKY_FOX SYXZ syxz shift + syxz TTPTHA ZAAADA ZBAAACA ZJAAADC 01322222 589589 589721 595595 598598
AMI BIOS backdoor passwords:
AMI AAAMMMIII BIOS PASSWORD HEWITT RAND AMI?SW AMI_SW LKWPETER A.M.I. CONDO
PHOENIX BIOS backdoor passwords:
phoenix, PHOENIX, CMOS, BIOS
MISC. COMMON PASSWORDS
ALFAROME BIOSTAR biostar biosstar CMOS cmos LKWPETER lkwpeter setup SETUP Syxz Wodj
OTHER BIOS PASSWORDS BY MANUFACTURER
Manufacturer Password
VOBIS & IBM merlin
Dell Dell
Biostar Biostar
Compaq Compaq
Enox xo11nE
Epox central
Freetech Posterie
IWill iwill
Jetway spooml
Packard Bell bell9
QDI QDI
Siemens SKY_FOX
TMC BIGO
Toshiba Toshiba

TOSHIBA BIOS
Most Toshiba laptops and some desktop systems will bypass the BIOS password if the left shift key is held down during boot
IBM APTIVA BIOS
Press both mouse buttons repeatedly during the boot
--------------------------------------------------------------------------------
Password cracking software
The following software can be used to either crack or reset the BIOS on many chipsets. If your PC is locked with a BIOS administrator password that will not allow access to the floppy drive, these utilities may not work. Also, since these utilities do not come from the manufacturer, use them cautiously and at your own risk.
Cmos password recovery tools 3.1
!BIOS (get the how-to article)
RemPass
KILLCMOS

--------------------------------------------------------------------------------
Using the Motherboard "Clear CMOS" Jumper or Dipswitch settings
Many motherboards feature a set of jumpers or dipswitches that will clear the CMOS and wipe all of the custom settings including BIOS passwords. The locations of these jumpers / dipswitches will vary depending on the motherboard manufacturer and ideally you should always refer to the motherboard or computer manufacturers documentation. If the documentation is unavailable, the jumpers/dipswitches can sometimes be found along the edge of the motherboard, next to the CMOS battery, or near the processor. Some manufacturers may label the jumper / dipswitch CLEAR - CLEAR CMOS - CLR - CLRPWD - PASSWD - PASSWORD - PWD. On laptop computers, the dipswitches are usually found under the keyboard or within a compartment at the bottom of the laptop. Please remember to unplug your PC and use a grounding strip before reaching into your PC and touching the motherboard. Once you locate and rest the jumper switches, turn the computer on and check if the password has been cleared. If it has, turn the computer off and return the jumpers or dipswitches to its original position.
--------------------------------------------------------------------------------
Removing the CMOS Battery
The CMOS settings on most systems are buffered by a small battery that is attached to the motherboard. (It looks like a small watch battery). If you unplug the PC and remove the battery for 10-15 minutes, the CMOS may reset itself and the password should be blank. (Along with any other machine specific settings, so be sure you are familiar with manually reconfiguring the BIOS settings before you do this.) Some manufacturers backup the power to the CMOS chipset by using a capacitor, so if your first attempt fails, leave the battery out (with the system unplugged) for at least 24 hours. Some batteries are actually soldered onto the motherboard making this task more difficult. Unsoldering the battery incorrectly may damage your motherboard and other components, so please don't attempt this if you are inexperienced. Another option may be to remove the CMOS chip from the motherboard for a period of time. Note: Removing the battery to reset the CMOS will not work for all PC's, and almost all of the newer l aptops store their BIOS passwords in a manner which does not require continuous power, so removing the CMOS battery may not work at all. IBM Thinkpad laptops lock the hard drive as well as the BIOS when the supervisor password is set. If you reset the BIOS password, but cannot reset the hard drive password, you may not be able to access the drive and it will remain locked, even if you place it in a new laptop. IBM Thinkpads have special jumper switches on the motherboard, and these should be used to reset the system.
--------------------------------------------------------------------------------
Overloading the KeyBoard Buffer
On some older computer systems, you can force the CMOS to enter its setup screen on boot by overloading the keyboard buffer. This can be done by booting with the keyboard or mouse unattached to the systems, or on some systems by hitting the ESC key over 100 times in rapid succession.
--------------------------------------------------------------------------------
Jumping the Solder Beads on the CMOS
It is also possible to reset the CMOS by connecting or "jumping" specific solder beads on the chipset. There are too many chipsets to do a breakdown of which points to jump on individual chipsets, and the location of these solder beads can vary by manufacturer, so please check your computer and motherboard documentation for details. This technique is not recommended for the inexperienced and should be only be used as a "last ditch" effort.
--------------------------------------------------------------------------------
Using a professional service
If the manufacturer of the laptop or desktop PC can't or won't reset the BIOS password, you still have the option of using a professional service. Password Crackers, Inc., offers a variety of services for desktop and laptop computers for between $100 and $400. For most of these services, you'll need to provide some type of legitimate proof of ownership. This may be difficult if you've acquired the computer second hand or from an online auction.

so that's alldone with cracking Bios passwords :) adios every1.

How To Change Your Ip In Less Then 1 Minute

OK today i am going to show you how to hide your ip the easy way !!! with no software ....

1. Click on "Start" in the bottom left hand corner of screen
2. Click on "Run"
3. Type in "command" and hit OK


You should now be at an MSDOS prompt screen.
4. Type "ipconfig /release" just like that, and hit "enter"
5. Type "exit" and leave the prompt
6. Right-click on "Network Places" or "My Network Places" on your desktop.
7. Click on "properties"


You should now be on a screen with something titled "Local Area Connection", or something close to that, and, if you have a network hooked up, all of your other networks.

8. Right click on "Local Area Connection" and click "properties"
9. Double-click on the "Internet Protocol (TCP/IP)" from the list under the "General" tab
10. Click on "Use the following IP address" under the "General" tab
11. Create an IP address (It doesn't matter what it is. I just type 1 and 2 until i fill the area up).
12. Press "Tab" and it should automatically fill in the "Subnet Mask" section with default numbers.
13. Hit the "Ok" button here
14. Hit the "Ok" button again

You should now be back to the "Local Area Connection" screen.
15. Right-click back on "Local Area Connection" and go to properties again.
16. Go back to the "TCP/IP" settings
17. This time, select "Obtain an IP address automatically"
18. Hit "Ok"
19. Hit "Ok" again
20. You now have a new IP address

With a little practice, you can easily get this process down to 15 seconds.
note: This only changes your dynamic IP address, not your ISP/IP address. If you plan on hacking a website with this trick be extremely careful, because if they try a little, they can trace it back.

LIKE EVERYTHING ON UR CURRENT FB PAGE

To like everything on your current page, all you need to do is download a extension for google chrome . Ur done , you can find the extensios on this link .
http://www.chromeextensions.org/social-communications/facebook-like-all/
.

This tweak is not supported for firefox users . you can probaly jump to chrome to perform this tweak and get back to firefox after your done .

10 Fast and Free Security Enhancements

Before you spend a dime on security, there are many precautions you can take that will protect you against the most common threats.

1. Check Windows Update and Office Update regularly (http://office.microsoft.com/productupdates); have your Office CD ready. Windows Me, 2000, and XP users can configure automatic updates. Click on the Automatic Updates tab in the System control panel and choose the appropriate options.

2. Install a personal firewall. Both SyGate (www.sygate.com) and ZoneAlarm (www.zonelabs.com) offer free versions.

3. Install a free spyware blocker. Our Editors' Choice ("Spyware," April 22) was SpyBot Search & Destroy (http://security.kolla.de). SpyBot is also paranoid and ruthless in hunting out tracking cookies.

4. Block pop-up spam messages in Windows NT, 2000, or XP by disabling the Windows Messenger service (this is unrelated to the instant messaging program). Open Control Panel | Administrative Tools | Services and you'll see Messenger. Right-click and go to Properties. Set Start-up Type to Disabled and press the Stop button. Bye-bye, spam pop-ups! Any good firewall will also stop them.

5. Use strong passwords and change them periodically. Passwords should have at least seven characters; use letters and numbers and have at least one symbol. A decent example would be f8izKro@l. This will make it much harder for anyone to gain access to your accounts.

6. If you're using Outlook or Outlook Express, use the current version or one with the Outlook Security Update installed. The update and current versions patch numerous vulnerabilities.

7. Buy antivirus software and keep it up to date. If you're not willing to pay, try Grisoft AVG Free Edition (Grisoft Inc., w*w.grisoft.com). And doublecheck your AV with the free, online-only scanners available at w*w.pandasoftware.com/activescan and _http://housecall.trendmicro.com.

8. If you have a wireless network, turn on the security features: Use MAC filtering, turn off SSID broadcast, and even use WEP with the biggest key you can get.

9. Join a respectable e-mail security list, such as the one found at our own Security Supersite at _http://security.ziffdavis.com, so that you learn about emerging threats quickly and can take proper precautions.

10. Be skeptical of things on the Internet. Don't assume that e-mail "From:" a particular person is actually from that person until you have further reason to believe it's that person. Don't assume that an attachment is what it says it is. Don't give out your password to anyone, even if that person claims to be from "support."

WINDOWS XP HIDDEN APPS

I am sure most of us does not know most of these app's which are available in windows xp.
To run any of these apps go to Start > Run and type the executable name (ie charmap).

==============================================
1) Character Map = charmap.exe (very useful for finding unusual characters)
2) Disk Cleanup = cleanmgr.exe
3) Clipboard Viewer = clipbrd.exe (views contents of Windows clipboard)
4) Dr Watson = drwtsn32.exe (Troubleshooting tool)
5) DirectX diagnosis = dxdiag.exe (Diagnose & test DirectX, video & sound cards)
6) Private character editor = eudcedit.exe (allows creation or modification of characters)
7) IExpress Wizard = iexpress.exe (Create self-extracting / self-installing package)
8) Microsoft Synchronization Manager = mobsync.exe (appears to allow synchronization of files on the network for when working offline. Apparently undocumented).
9) Windows Media Player 5.1 = mplay32.exe (Retro version of Media Player, very basic).
10) ODBC Data Source Administrator = odbcad32.exe (something to do with databases)
11) Object Packager = packager.exe (to do with packaging objects for insertion in files, appears to have comprehensive help files).
12) System Monitor = perfmon.exe (very useful, highly configurable tool, tells you everything you ever wanted to know about any aspect of PC performance, for uber-geeks only )
13) Program Manager = progman.exe (Legacy Windows 3.x desktop shell).
14) Remote Access phone book = rasphone.exe (documentation is virtually non-existant).
15) Registry Editor = regedt32.exe [also regedit.exe] (for hacking the Windows Registry).
16) Network shared folder wizard = shrpubw.exe (creates shared folders on network).
17) File signature verification tool = sigverif.exe
18) Volume Control = sndvol32.exe (I've included this for those people that lose it from the System Notification area).
19) System Configuration Editor = sysedit.exe (modify System.ini & Win.ini just like in Win98! ).
20) Syskey = syskey.exe (Secures XP Account database - use with care, it's virtually undocumented but it appears to encrypt all passwords, I'm not sure of the full implications).
21) Microsoft Telnet Client = telnet.exe
22) Driver Verifier Manager = verifier.exe (seems to be a utility for monitoring the actions of drivers, might be useful for people having driver problems. Undocumented).
23) Windows for Workgroups Chat = winchat.exe (appears to be an old NT utility to allow chat sessions over a LAN, help files available).
24) System configuration = msconfig.exe (can use to control starup programs)
25) gpedit.msc used to manage group policies, and permissions .

HACK INTO SOME1'S PC AND CHANGE THEIR PASSWORD

Hello today i'm going to show you how to change someone's administrator password . There are many ways to do that .

Method 1 : COMMAND PROMPT


step 1:goto start-> run -> type cmd . In cmd type net user(remember to use a space). search the user whose password you want to reset .

step 2:then type net user username password to be over written and * . (note do not forget *) . do this step 3 times to change the password .

step 3: that's it , this will change the password .


Method 2 : USING WINDOWS PASSWORD RESCUER ADVANCED.


step 1: download windows password rescuer advanced and install it on your computer .

step 2: using this create a bootable cd/dvd or a usb drive from the drop down menu . Restart your computer , then from bios select boot from cd/dvd or USB (press f2 or delete to goto BIOS ,varies from pc to pc)

step 3:
when you select appropriate option then it will lead you to a friendly operating window , there select your OS and select whose password you want to change(admin/user). after changing you can login with your changed password .

STOP A RESTART PROCESS IN 3 STEPS

Some times we need to stop some restart process quickly. In windows XP some times it gives auto restart warning and here is good solution for it.
1. Go to Start menu
2. Click on RUN(shortcut = windows key+r)
3. Enter the following command excluding hash codes "shutdown -a"

It's done , Windows wont shut down .

How to hide folders(color match up)

I like to call this hack a color match up because the folder color matches up with the background camouflaging the folder with the background .First create a new folder somewhere on your hard drive when you name it hold down "Alt" and press "0160" this will create and invisible space so it will appear as if it has no name. then right click in and select "Properties" select the tab "customize" and select "change icon" scroll along and you should a few blank spaces click on any one . the blank spaces will look as these .


click OK when you have saved the settings the folder will be invisible to hide all your personal files

HOW TO SETUP PROXIES IN YOUR BROWSER.

======================================================================
How to set up proxies in your browser!!!!!!!!!!
======================================================================


===================================
In Internet Explorer
===================================

Click "Tools", then "Internet Options", the in the "connections" Tab, click the "LAN Setup" Button in the bottom. There is a "Proxy Servers", tick the "Use a proxy....." and then enter the proxy in the bigger textbox and the port (the part that comes after the ":") in the smaller textbox. Hit okay, and then go to

www.whatismyip.com

to see if the proxy is now your IP.

===================================
In OPERA
===================================

Click "Files", then "Preferences", then "Network", then click the button "Proxy Servers", tick "HTTP", fill in with the proxy:port, click okay and that's it! Don't forget to check with CODE
www.whatismyip.com

===================================
In Firefox
===================================

Tools -> Options
Then click the General Icon
Then the "Connection Settings..." button
Then click the "manually configure proxies" radio button, and enter the proxy address and port in the HTTP Proxy area.
Don't forget to check with www.whatismyip.com....
Also do check with these sites for more proxies !!!!

CODE www.proxy4free.com www.safeproxy.org www.megaproxy.com www.guardster.com www.silenter.com www.anonymizer.com

Happy Anonymous surfing! To be clear: if I give you 255.255.255.255:8080, that means 255.255.255.255 is the proxy and 8080 is the port To Obtain Fresh and new proxies,u can always check Google...

HOW TO REMOVE AND ADD RIGHT-CLICK MENU ITEMS.

NOTE: Before trying something out with registry always backup the registry , Ive a tutorial to backup registry you can have a look and then try . If you do not backup and try , you might end up in formatting your OS.

Removing Items


A lot of programs you install will add themselves to the right-click menu of your files and/or folders. And most times, you have no choice in the matter and, as a result, your right-click menu can get very long with added items you don't even use. The last person I was helping with this had a right context menu so long that the Rename option was no longer visible! Fortunately, you can easily remove those unwanted menu items, if you know the registry values to edit. And it's not at all difficult once you know the keys responsible for the additions.

For Files, the secret lies in the "context menu handlers" under the shellex subkey for "All Files" which, in the registry, is nothing but an asterisk - like a dos wildcard, which means the values entered apply to all files. It is at the very top of the Root key, right here:

HKEY_CLASSES_ROOT\*\shellex\ContextMenuHandlers

Click the the + sign next to the ContextMenuHandlers key, to expand it.
Now you will see some of the programs that have added items to your right-click menu. Simply delete the program keys you don't want. Yup! It's that simple. If deleting makes you uneasy, just export the key before deleting it. Or, instead of deleting the values, disable them. Simply double click the default value for the program on the right hand pane and rename the clsid value by placing a period or dash in front of it.
ie; - {b5eedee0-c06e-11cf-8c56-444553540000}
Then exit the registry, refresh, and right click a file to see if the item was removed from the menu. Some programs - like WinZip or WinRar - will add several items to your right click menu but all of them will be removed by deleting or disabling their one context menu handler.
Note that the above key only applies to the right click menu of files. To remove entries from the right click context menu of folders, you need to navigate to the Folder and Drive keys:
HKEY_CLASSES_ROOT\Folder\shellex\ContextMenuHandlers
HKEY_CLASSES_ROOT\Drive\shellex\ContextMenuHandlers
All you have to do is follow the same procedure as for Files - either disable or delete items you wish to remove.

Adding Items


Adding Items to the right click menu of Files and Folders is also fairly simple using the Registry. It just involves the creation of a few new keys for each item you wish to add. You edit the same keys used for removing items. Let's use Notepad as an example of an item you'd like to add to the right click menu of all your files or folders.
For folders, go to this key:
HKEY_CLASSES_ROOT\Folder
Click the + sign next to Folder and expand it so that the Shell key is visible. Right click the Shell key and choose New>Key and name the key Notepad or whatever else you'd prefer (whatever the key is named is what will appear in the right-click menu). Now right click the new key you made and create another key named Command. Then, in the right hand pane, double click "Default" and enter Notepad.exe as the value. Exit the registry, refresh, and right click any folder. Notepad should now be on the context menu.

For files, go here again:
HKEY_CLASSES_ROOT\* Expand the * key and see if a Shell key exists. If it does exist, follow the same procedure as for folders. If it does not exist, you'll have to create a new Shell first. Just right click the * key and choose New>Key and name it Shell. Then right click the Shell key and continue on the same way you did for adding items to the right click menu of folders. Once done, Notepad should appear as an option in the right click menu of all your files.
HOW TO REMOVE AND ADD RIGHT-CLICK MENU ITEMS.

CREATE ONE-CLICK SHUTDOWN AND REBOOT SHORTCUTS

First, create a shortcut on your desktop by right-clicking on the desktop, choosing New, and then choosing Shortcut. The Create Shortcut Wizard appears. In the box asking for the location of the shortcut, type shutdown. After you create the shortcut, double-clicking on it will shut down your PC.

But you can do much more with a shutdown shortcut than merely shut down your PC. You can add any combination of several switches to do extra duty, like this:

shutdown -r -t 01 -c "Rebooting your PC"

Double-clicking on that shortcut will reboot your PC after a one-second delay and display the message "Rebooting your PC.
" The shutdown command includes a variety of switches you can use to customize it. Table 1-3 lists all of them and describes their use.
I use this technique to create two shutdown shortcuts on my desktop—one for turning off my PC, and one for rebooting. Here are the ones I use:

shutdown -s -t 03 -c "Bye Bye !!!"

shutdown -r -t 03 -c "Ill be back ;)!"


Switch What it does
-s
Shuts down the PC.
-l
Logs off the current user.

-t nn
Indicates the duration of delay, in seconds, before performing the action.

-c "messagetext"

Displays a message in the System Shutdown window. A maximum of 127 characters can be used. The message must be enclosed in quotation marks.
-f
Forces any running applications to shut down.
-r Reboots the PC.

BEST KEYBOARD SHORTCUTS EVER

Getting used to using your keyboard exclusively and leaving your mouse behind will make you much more efficient at performing any task on any Windows system. In This tutorial there are more than 100 shortcut keys .


Windows key + R = Run menu

This is usually followed by:
cmd = Command Prompt
iexplore + "web address" = Internet Explorer
compmgmt.msc = Computer Management
dhcpmgmt.msc = DHCP Management
dnsmgmt.msc = DNS Management
services.msc = Services
eventvwr = Event Viewer
dsa.msc = Active Directory Users and Computers
dssite.msc = Active Directory Sites and Services
Windows key + E = Explorer
ALT + Tab = Switch between windows
ALT, Space, X = Maximize window
CTRL + Shift + Esc = Task Manager
Windows key + Break = System properties
Windows key + F = Search
Windows key + D = Hide/Display all windows
CTRL + C = copy
CTRL + X = cut
CTRL + V = paste
Also don't forget about the "Right-click" key next to the right Windows key on your keyboard. Using the arrows and that key can get just about anything done once you've opened up any program.

Keyboard Shortcuts


[Alt] and [Esc] Switch between running applications
[Alt] and letter Select menu item by underlined letter
[Ctrl] and [Esc] Open Program Menu
[Ctrl] and [F4] Close active document or group windows (does not work with some applications)
[Alt] and [F4] Quit active application or close current window
[Alt] and [-] Open Control menu for active document
[Ctrl] Left, Rt. arrow Move cursor forward or back one word
[Ctrl] Up, Down arrow Move cursor forward or back one paragraph
[F1] Open Help for active application
Windows+M Minimize all open windows
Shift+Windows+M Undo minimize all open windows
Windows+F1 Open Windows Help
Windows+Tab Cycle through the Task bar buttons
Windows+Break Open the System Properties dialog box

Accessibility shortcuts


Right SHIFT for eight seconds........ Switch Filter Keys on and off.
Left ALT +left SHIFT +PRINT SCREEN....... Switch High Contrast on and off.
Left ALT +left SHIFT +NUM LOCK....... Switch Mouse Keys on and off.
SHIFT....... five times Switch Sticky Keys on and off.
NUM LOCK...... for five seconds Switch Toggle Keys on and off.
explorer shortcuts

END....... Display the bottom of the active window.
HOME....... Display the top of the active window.
NUM LOCK+ASTERISK....... on numeric keypad (*) Display all sub folders under the selected folder.
NUM LOCK+PLUS SIGN....... on numeric keypad (+) Display the contents of the selected folder.
NUM LOCK+MINUS SIGN....... on numeric keypad (-) Collapse the selected folder.
LEFT ARROW...... Collapse current selection if it's expanded, or select parent folder.
RIGHT ARROW....... Display current selection if it's collapsed, or select first sub folder.


Type the following commands in your Run Box (Windows Key + R) or Start Run
devmgmt.msc = Device Manager
msinfo32 = System Information
cleanmgr = Disk Cleanup
ntbackup = Backup or Restore Wizard (Windows Backup Utility)
mmc = Microsoft Management Console
excel = Microsoft Excel (If Installed)
msaccess = Microsoft Access (If Installed)
powerpnt = Microsoft PowerPoint (If Installed)
winword = Microsoft Word (If Installed)
frontpg = Microsoft FrontPage (If Installed)
notepad = Notepad
wordpad = WordPad
calc = Calculator
msmsgs = Windows Messenger
mspaint = Microsoft Paint
wmplayer = Windows Media Player
rstrui = System Restore
netscp6 = Netscape 6.x
netscp = Netscape 7.x
netscape = Netscape 4.x
waol = America Online
control = Opens the Control Panel
control printers = Opens the Printers Dialog

Internet browser

type in your address "google", then press [Right CTRL] and [Enter] add www. and .com to word and go to it
For Windows XP:
Copy. CTRL+C
Cut. CTRL+X
Paste. CTRL+V
Undo. CTRL+Z
Delete. DELETE
Delete selected item permanently without placing the item in the Recycle Bin. SHIFT+DELETE
Copy selected item. CTRL while dragging an item
Create shortcut to selected item. CTRL+SHIFT while dragging an item
Rename selected item. F2
Move the insertion point to the beginning of the next word. CTRL+RIGHT ARROW
Move the insertion point to the beginning of the previous word. CTRL+LEFT ARROW
Move the insertion point to the beginning of the next paragraph. CTRL+DOWN ARROW
Move the insertion point to the beginning of the previous paragraph. CTRL+UP ARROW
Highlight a block of text. CTRL+SHIFT with any of the arrow keys
Select more than one item in a window or on the desktop, or select text within a document. SHIFT with any of the arrow keys Select all. CTRL+A
Search for a file or folder. F3
View properties for the selected item. ALT+ENTER
Close the active item, or quit the active program. ALT+F4
Opens the shortcut menu for the active window. ALT+SPACEBAR
Close the active document in programs that allow you to have multiple documents open simultaneously. CTRL+F4
Switch between open items. ALT+TAB
Cycle through items in the order they were opened. ALT+ESC
Cycle through screen elements in a window or on the desktop. F6
Display the Address bar list in My Computer or Windows Explorer. F4
Display the shortcut menu for the selected item. SHIFT+F10
Display the System menu for the active window. ALT+SPACE BAR
Display the Start menu. CTRL+ESC
Display the corresponding menu. ALT+Underlined letter in a menu name
Carry out the corresponding command. Underlined letter in a command name on an open menu
Activate the menu bar in the active program. F10
Open the next menu to the right, or open a sub menu. RIGHT ARROW
Open the next menu to the left, or close a sub menu. LEFT ARROW
Refresh the active window. F5
View the folder one level up in My Computer or Windows Explorer. BACKSPACE
Cancel the current task. ESC
SHIFT when you insert a CD into the CD-ROM drive Prevent the CD from automatically playing.

Use these keyboard shortcuts for dialog boxes:


To Press Move forward through tabs. CTRL+TAB
Move backward through tabs. CTRL+SHIFT+TAB
Move forward through options. TAB
Move backward through options. SHIFT+TAB
Carry out the corresponding command or select the corresponding option. ALT+Underlined letter
Carry out the command for the active option or button. ENTER
Select or clear the check box if the active option is a check box. SPACEBAR
Select a button if the active option is a group of option buttons. Arrow keys
Display Help. F1
Display the items in the active list. F4
Open a folder one level up if a folder is selected in the Save As or Open dialog box. BACKSPACE

If you have a Microsoft Natural Keyboard, or any other compatible keyboard that includes the Windows logo key and the Application key , you can use these keyboard shortcuts:
Display or hide the Start menu. WIN Key
Display the System Properties dialog box. WIN Key+BREAK
Show the desktop. WIN Key+D
Minimize all windows. WIN Key+M
Restores minimized windows. WIN Key+Shift+M
Open My Computer. WIN Key+E
Search for a file or folder. WIN Key+F
Search for computers. CTRL+WIN Key+F
Display Windows Help. WIN Key+F1
Lock your computer if you are connected to a network domain, or switch users if you are not connected to a network domain. WIN Key+ L
Open the Run dialog box. WIN Key+R
Open Utility Manager. WIN Key+U

Accessibility keyboard shortcuts:


Switch Filter Keys on and off. Right SHIFT for eight seconds
Switch High Contrast on and off. Left ALT+left SHIFT+PRINT SCREEN
Switch Mouse Keys on and off. Left ALT +left SHIFT +NUM LOCK
Switch Sticky Keys on and off. SHIFT five times
Switch Toggle Keys on and off. NUM LOCK for five seconds
Open Utility Manager. WIN Key+U

Shortcuts you can use with Windows Explorer:


Display the bottom of the active window. END
Display the top of the active window. HOME
Display all sub folders under the selected folder. NUM LOCK+ASTERISK on numeric keypad (*)
Display the contents of the selected folder. NUM LOCK+PLUS SIGN on numeric keypad (+)
Collapse the selected folder. NUM LOCK+MINUS SIGN on numeric keypad (-)
Collapse current selection if it's expanded, or select parent folder. LEFT ARROW
Display current selection if it's collapsed, or select first sub folder. RIGHT ARROW

HOW TO HIDE FILES INSIDE A IMAGE FILE USING COMMAND PROMPT

Today i'm gonna show you how to combine two files .


step1: collect all the data that you want to hide and zip it using winrar or winzip or some zip software . you can do this by right clicking anywhere on the desktop->new->winrar archive and just drag and drop the files to hide inside the archive .

step2: now select a picture you want to hide or to make it front end and save it in the same location as that of the archive .

step3: open run->type cmd , go to the location you want to by using cd command .

step4: now using copy command v r going to hide the rar file inside jpg file . copy /B front end file.jpg+hidden.rar secret.jpg


step5: now when you open 1234.jpg the front end pic will open up , but when you right click on that same pic and open it with winrar then you will see all your hidden files in one archieve . notice the file names are same , even the rar file has jpg format .


VIRTUAL BOX --> THE ULTIMATE TOOL!!!

EVER HEARD OF VIRTUAL BOX


well lets find out !!! virtual box is a tool easily installable in your operating systems . Basically it's a tool that helps you to use 2 OS (operating system) in a single environment without compromising the other. People who who have some knowledge about computers would usually know that you cannot install windows xp in your hard drive once you install windows 7 , But i say it's easily possible with virtual box. here today I'm gonna show you to install fedora 16 and backtrack .

step 1: Download virtual box . just Google it , you can download it for free from it's official site . there are various versions to select on .

step 2:install virtual box in your machine (during installation it might give some error just click continue anyway). Download the ISO of backtrack or fedora 16 , it is your wish which OS you prefer . both these OS are open source you will get them for free on their official website.

step 3: open virtual box and just follow the steps . click new ->next -> type the name of the OS if it's fedora it'll automatically select but if you are selecting backtrack , select UBUNTU or other click next -> select appropriate memory you can also change the memory later . click next -> select create new hard disk , click next . select virtual disk image click next . ->dynamically allocated click next -> select the size of your virtual disk (hard disk space in your virtual OS). click next -> create


step 4: now right click on the file and click on settings , browse to this location then storage-> empty and click on the CD like icon available , select choose a virtual disk and browse to your ISO file . if there is no error then a orange line will appear . Click start now probably a new window should pop up . and begin your installation.

step 5: now wait for some time and it should boot up in the virtual window . If you want to setup it then you should go to system tools and click install on hard drive . select all the appropriate options and click next . there is a options called as WHAT TYPE OF INSTALLATION WOULD YOU LIKE . I personally would prefer use free space ,then wait for the OS to install .

step 6: then it would boot up automatically and will ask a few questions . that's it , your done . next time when you want to start that OS just click start and your OS will start .

HOW TO UNLOCK CERTAIN PAGES THAT HAVE BEEN BLOCKED BY YOUR COLLEGE OR SCHOOL

There are a number of techniques to get past Internet filtering. If your aim is simply to reach pages or services on the Internet that are blocked from your location, and you are not concerned whether other people can detect and monitor your circumvention, these techniques may be all you need: Using third-party Web sites to reach blocked content.

• Using alternative domain names (or domain name servers) to reach blocked content.

• Using e-mail gateways to retrieve blocked Web pages over e-mail.

• Using third-party sites.

There are a number of different ways you can reach the content on a Web page by going through a third-party web site rather than directly to the source web site.

Cached Pages


Many search engines keep copies of Web pages they have previously indexed, called cached pages. When searching for a Web site, look for a small link labeled "cached" next to your search results. Since you are retrieving a copy of the blocked page from the search engine's servers, and not from the blocked Web site itself, you may be able to access the blocked content. However, some countries have targeted caching services for blocking, as well. 


 RSS Aggregators


RSS aggregators are Web sites that allow you to subscribe to and read RSS feeds, which are streams of news or other information put out by sites you have chosen. (RSS stands for "Really Simple Syndication"; for more on how to use it, see http://rssexplained.blogspot.com/.) An RSS aggregator connects to Web sites, downloads the feeds that you have selected, and displays them. Since it is the aggregator connecting to the Web sites, and not you, you may be able to access sites that would otherwise be blocked. This technique works only for Web sites that publish RSS feeds of their content, of course, and therefore is most useful for blogs and news sites. There are a lot of free, online RSS aggregators available. Some of the most popular ones include Google Reader (http://reader.google.com) and Bloglines (http://www.bloglines.com). Below is an example of Google Reader displaying the news:


Translators


There are many language translation services available on the Internet, often provided by search engines. If you access a Web site through a translation service, the translation service is accessing the blocked site, not you. This allows you to read the blocked content translated into a number of different languages. You can use the translation service to bypass blocking, even if you don't actually need to translate the text. You do this by choosing translation from a language that does not appear on the original Web site back to the original language. For example, to use a translation service to view an English-language Web site, choose translation from Chinese to English. The translation service translates only the Chinese sections (there are none), and leaves the English sections (which is the whole Web page) untranslated. Popular translation services include http://babelfish.yahoo.com/ and http://translate.google.com/. The example below illustrates the three steps necessary to view a page in Babelfish. First, enter the URL of the Web site you wish to visit:

Next, choose the language you wish to read the Web site in. In this example, we tell Babelfish to translate from Korean to English. Since there is no Korean text, the page will remain untranslated .
When you have chosen the language, click "Translate" and the page displays


SECURE VPN'S : HOTSPOT SHIELD

WHAT ARE VPN's??


vpn's are virtual private network . vpn's can be used to bypass cencorship or blocked sites. suppose your college has blocked sites to avoid access to certain websites like facebook etc . so what you can do to bypass this censorship is install vpn in your pc and access internet. one of my favorite vpn is hotspot vpn.

step 1: download hotspot shield from it's official site for free. there are other premium versions available too .

step 2: install hotspot shield and check your ip address , it would ve been changed .

step 3: to disconnect open hotspot shield from taskbar and click disconnect.

FIREFOX TWEAKS THAT WILL INCREASE INTERNET SPEED

Yes, u saw what u saw !!! firefox is already pretty damn fast but did you know that you can tweak it and improve the speed even more?


That's the beauty of this program being open source.
Here's what you do:
In the URL bar, type “about:config” and press enter. This will bring up the configuration “menu” where you can change the parameters of Firefox.

Note that these are what I’ve found to REALLY speed up my Firefox significantly - and these settings seem to be common among everybody else as well. But these settings are optimized for broadband connections.

Double Click on the following settins and put in the numbers below - for the true / false booleans - they’ll change when you double click.

Code:
browser.tabs.showSingleWindowModePrefs – true
network.http.max-connections – 48
network.http.max-connections-per-server – 16
network.http.max-persistent-connections-per-proxy – 8
network.http.max-persistent-connections-per-server – 4
network.http.pipelining – true
network.http.pipelining.maxrequests – 100
network.http.proxy.pipelining – true
network.http.request.timeout – 300
One more thing… Right-click somewhere on that screen and add a NEW -> Integer. Name it “nglayout.initialpaint.delay” and set its value to “0”. This value is the amount of time the browser waits before it acts on information it receives. Since you’re broadband - it shouldn’t have to wait.

Now you should notice you’re loading pages MUCH faster now!

HOW TO DELETE AN UNDELETABLE FILE

Open a Command Prompt window and leave it open.
Close all open programs.
Click Start, Run and enter TASKMGR.EXE
Go to the Processes tab and End Process on Explorer.exe.
Leave Task Manager open.
Go back to the Command Prompt window and change to the directory the AVI (or other undeletable file) is located in.
At the command prompt type DEL where is the file you wish to delete.
Go back to Task Manager, click File, New Task and enter EXPLORER.EXE to restart the GUI shell. Close Task Manager.

Or you can try this


Open Notepad.exe
Click File>Save As..>
locate the folder where ur undeletable file is
Choose 'All files' from the file type box
click once on the file u wanna delete so its name appears in the 'filename' box
put a " at the start and end of the filename
(the filename should have the extension of the undeletable file so it will overwrite it)
click save,
It should ask u to overwrite the existing file, choose yes and u can delete it as normal

Here's a manual way of doing it.


1. Start
2. Run
3. Type: command
4. To move into a directory type: cd c:\*** (The stars stand for your folder)
5. If you cannot access the folder because it has spaces for example Program Files or Kazaa Lite folder you have to do the following. instead of typing in the full folder name only take the first 6 letters then put a ~ and then 1 without spaces. Example: cd c:\progra~1\kazaal~1
6. Once your in the folder the non-deletable file it in type in dir - a list will come up with everything inside.
7. Now to delete the file type in del ***.bmp, txt, jpg, avi, etc... And if the file name has spaces you would use the special 1st 6 letters followed by a ~ and a 1 rule. Example: if your file name was bad file.bmp you would type once in the specific folder thorugh command, del badfil~1.bmp and your file should be gone. Make sure to type in the correct extension.

WATCH STARWARS MOVIE ON MS-DOS


step 1 :Before we begin let me tell you that this trick only works on windows xp. open DOS by opening run from start. type telnet.

step 2 :Type o { o because it will connect to host . syntax is open hostname port }. It will ask destination or (TO) type towel.blinkenlights.nl . this will start playing starwars in low resolution mode .


How to unlock USB ports in your school or college

There are two ways of unblocking usb ports in your college . one is done using BIOS(basic input output system) and second one is done using registry . I am gonna show you both the ways . lets start with the registry one .

using registry:

Step1:Now open run and type regedit this will open windows registry . Then browse to the following :HKEY_LOCAL_MACHINE\SYSTEM\currentcontrolset\services\USBSTOR


Step2: Now on the right hand pane double click on registry start . now if you change this value to 3 it will enable the ports if you change the value to 4 it will disable it .


using BIOS:


step 1:enter bios by pressing f1 or f11 or esc or what ever it varies from system to system . Then you will want to enter setup.

step 2 :search for advanced options and search usb ports enable it and have fun hacking . NOTE: sometimes the system administrator will use passwords to protect BIOS , you can by pass it by just removing the CMOS battery by opening the cabinet of the PC.
step2: now on the right hand pane double click on registry start . now if you change this value to 3 it will enable the ports if you change the value to 4 it will disable it .


using BIOS:

step 1:enter bios by pressing f1 or f11 or esc or wat ever it varies frm system to system . Then you will want to enter setup.

step 2 :search for advanced options and search usb ports enable it and have fun hacking . NOTE: sometimes the system administrator will use passwords to protect BIOS , you can by pass it by just removing the CMOS battery by opening the cabinet of the PC.
- See more at: http://www.hackerspoint.bugs3.com/usb.html#sthash.PzkZn7Gm.dpuf
there are two ways of unblocking usb ports in your college . one is done using BIOS(basic input output system) and second one is done using registry . I am gonna show you both the ways . lets start with the registry one .

using registry:

step1:now open run and type regedit this will open windows registry . Then browse to the following :HKEY_LOCAL_MACHINE\SYSTEM\currentcontrolset\services\USBSTOR - See more at: http://www.hackerspoint.bugs3.com/usb.html#sthash.PzkZn7Gm.dpuf

How to remove start up screen and show the background loading in XP

REMOVE WINDOWS XP SPLASH AND SEE THE OPERATION !!!


Are you having boot up problems and would like to know what it going on behind that Windows Loading Logo? To find out, you can disable the splash screen by making a small change to the Boot.ini file.
Follow these steps (carefully!):


1. Open the "System Properties" dialog box ( Settings - Control Panel - System)
2. On the Advanced tab, click the Settings button in the "Startup And Recovery" section.
3. In the "Startup And Recovery" dialog box, select the Edit button in the "System Startup" section.
4. The Boot.ini file will open in Notepad; locate the line that ends with the /fastdetect switch.
5. Position your cursor to the right after the parameter, press the spacebar, and add the /SOS switch.
6. Save the Boot.ini file, and close Notepad.
7. Click Cancel to close both the "Startup And Recovery" dialog box and the "System Properties" dialog box.
8. Restart the computer to see the effect.
Once the computer restarts you will notice that the Windows Splash Screen is no longer present. Instead you can observe some of the boot up operations that Windows XP performs during the startup stage.
To renable the splash screen, follow the same procedure but remove the "/SOS".


INSTERT YOUR FRIENDS PIC'S IN CHAT IN FACEBOOK

Hello friends today i'll show you how to insert your friends pictures inside inside the chat just like a emotion :)

step 1: go to your friends profile in facebook of whose picture you want to insert . go to address bar and copy the ID of the person eg : Ex: http://www.facebook.com/hackerspoint00 or http://www.facebook.com/profile.php?id=123456789 ..... copy the ID like thing that are in bold in the eg .

step 2:paste the copied ID in [[ ID ]] eg : [[hackerspoint]] press enter . u'll see the persons pic in the the chat. you can also google and get more emotions that are designed there are many emotions . my friend showed me a few like super man, spider man etc

Hello friends today i'll show you how to insert your friends pictures inside inside the chat just like a emotion :)

step 1: go to your friends profile in facebook of whose picture you want to insert . go to address bar and copy the ID of the person eg : Ex: http://www.facebook.com/hackerspoint or http://www.facebook.com/profile.php?id=123456789 ..... copy the ID like thing that are in bold in the eg .

step 2:paste the copied ID in [[ ID ]] eg : [[hackerspoint]] press enter . u'll see the persons pic in the the chat. you can also google and get more emotions that are designed there are many emotions . my friend showed me a few like super man, spider man etc

- See more at: http://www.hackerspoint.bugs3.com/friendspics.html#sthash.gFrAP5cL.dpuf

HOW TO BACK UP REGISTRY

Before you edit the registry, export the keys in the registry that you plan to edit, or back up the whole registry. If a problem occurs, you can then follow the steps how-to restore the registry to its previous state.


How to Export Registry Keys

Click Start, and then click Run.
In the Open box, type regedit, and then click OK.
On the File menu, click Export.
In the Save in box, select the boxs at the bottom the bottom according to weather you want to export all or only selected branches of the registry.
Next select a location in which to save the backup .reg file. In the File name box, type a file name, and then click Save.

How to Restore the Registry

To restore registry keys that you exported, double-click the .reg file that you saved.